This guide assumes you are using Windows and have already set up PuTTY to connect.
1. Configure PuTTY
When you start PuTTY you should see a window that looks like the next figure:
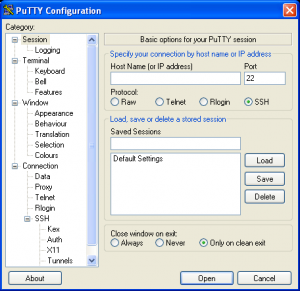
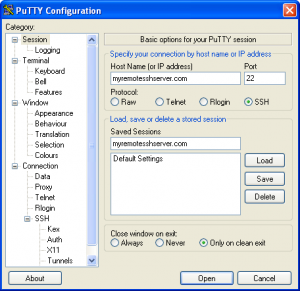
In the field labeled Host Name (or IP address), enter the hostname or TCP/IP address of your remote server. For the purposes of this tutorial my hostname will be myremotesshserver.com. In the textfield labeled Saved Sessions, enter a name that you want to use to identify this configuration. In my case I’m just going to put my hostname here. At this point your PuTTY window should look like this:
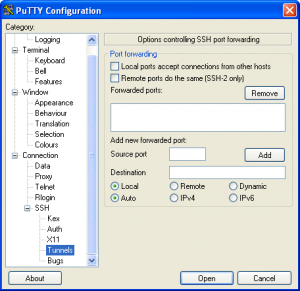
Next, on the left side of the PuTTY window there is a navigation tree. In navigation tree on the left, select the Tunnels item. This is shown in the next figure:
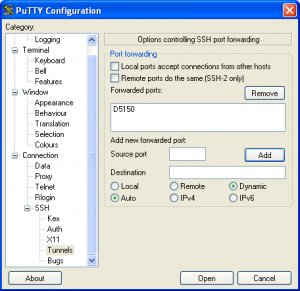
 Under the section labeled Add a new forwarded port type in a port like 5150 for the source port. Leave the Destination field blank, then select the Dynamic and Auto radio buttons. Then click the Add button, and you should see the text D5150 show up in the textarea as shown:
 Now in the PuTTY navigation tree on the left click on the Session node, and then click the Save button on the right side of the screen to save this configuration. All you have to do now, is login to your remote server. To do this, just click the Open button at the bottom of this window. That’s it – your tunnel is open.
2. Configure Firefox
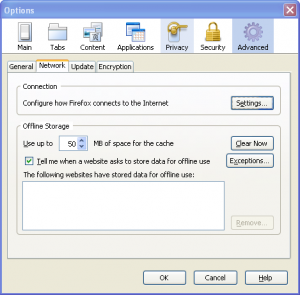
Start Firefox, then select the Tools menu, and then select the Options… menu item. Now click the Advanced icon, and then select the Network tab. This is shown in the next figure:
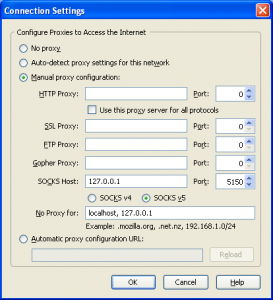
 Now click the Settings… button. This brings up the Connection Settings dialog. On this dialog click the Manual proxy configuration radio button, then put the address 127.0.0.1 in the SOCKS Host field. In the Port field enter the port you used when configuring your SSH tunnel with PuTTY. In my case this port was 5150:
 That’s all you need to do here. Just click OK on this dialog, click OK again on the Options dialog, and Firefox is ready to go. Happy browsing 🙂